Introduction to Stencil
The concept of Stencil is closely tied to the Stencil Buffer.
We know that the screen has a depth buffer. By default, if the distance of the pixel being rendered is greater than the value in the depth buffer, the current pass is discarded.
The Stencil Buffer is also a buffer, but unlike the depth buffer, which has built-in comparison behavior, the Stencil Buffer requires us to explicitly define how it should be processed.
The official docs12 cover this, though they can be a bit abstract. Let’s start with an example to make it easier to understand what it can actually do.
Stencil Test
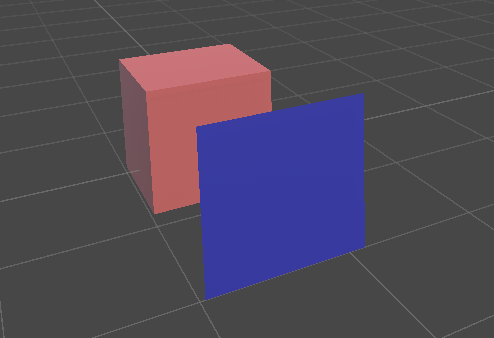
Suppose we have a Cube and a square plane Quad. When the Quad is in front of the Cube, it naturally occludes part of it.
Now, let’s replace the Quad with the following Shader. This Shader does the following:
Blend Zero Onemeans the original color is preserved, making the object effectively transparent.ZWrite Offdisables writing to the depth buffer.- The
Stencilblock defines the stencil test. For now, all we need to know is thatComp Alwaysmeans the test always passes, andPass Replacemeans that after the pass, the stencil buffer value is replaced with theRefvalue.
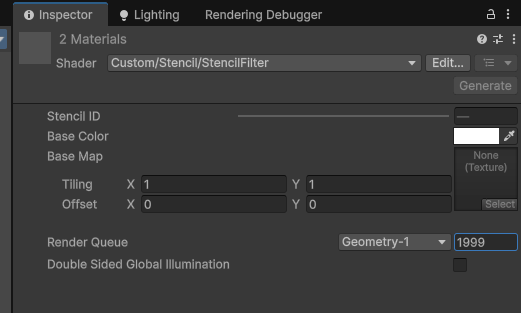
Shader "Custom/Stencil/StencilFilter"
{
    Properties
    {
        [IntRange] _StencilID ("Stencil ID", Range(0, 255)) = 1
    }

    SubShader
    {
        Tags {
            "RenderType" = "Opaque"
            "RenderPipeline" = "UniversalPipeline"
            "Queue" = "Geometry"
        }

        Blend Zero One
        ZWrite Off

        Stencil
        {
          Ref [_StencilID]
          Comp Always
          Pass Replace
        }

        Pass
        {
        }
    }
}
Now the Quad is transparent, but it also overwrites the Stencil Buffer values for its entire region.
Next, let’s replace the Cube’s Shader:
- Here we only care about the
Stencilblock.Comp Equalmeans the pass continues if theRefvalue equals the currentStencil Buffervalue; otherwise, rendering stops.
Shader "Custom/Stencil/StencilTest"
{
    Properties
    {
        [IntRange] _StencilID ("Stencil ID", Range(0, 255)) = 0
        [MainColor] _BaseColor("Base Color", Color) = (1, 1, 1, 1)
        [MainTexture] _BaseMap("Base Map", 2D) = "white"
    }

    SubShader
    {
        Tags {
            "RenderType" = "Opaque"
            "RenderPipeline" = "UniversalPipeline"
            "Queue" = "Geometry"
        }

        Stencil
        {
            Ref [_StencilID]
            Comp Equal
        }

        Pass
        {
            HLSLPROGRAM

            #pragma vertex vert
            #pragma fragment frag

            #include "Packages/com.unity.render-pipelines.universal/ShaderLibrary/Core.hlsl"

            struct Attributes
            {
                float4 positionOS : POSITION;
                float2 uv : TEXCOORD0;
            };

            struct Varyings
            {
                float4 positionHCS : SV_POSITION;
                float2 uv : TEXCOORD0;
            };

            TEXTURE2D(_BaseMap);
            SAMPLER(sampler_BaseMap);

            CBUFFER_START(UnityPerMaterial)
                half4 _BaseColor;
                float4 _BaseMap_ST;
            CBUFFER_END

            Varyings vert(Attributes IN)
            {
                Varyings OUT;
                OUT.positionHCS = TransformObjectToHClip(IN.positionOS.xyz);
                OUT.uv = TRANSFORM_TEX(IN.uv, _BaseMap);
                return OUT;
            }

            half4 frag(Varyings IN) : SV_Target
            {
                half4 color = SAMPLE_TEXTURE2D(_BaseMap, sampler_BaseMap, IN.uv) * _BaseColor;
                return color;
            }
            ENDHLSL
        }
    }
}
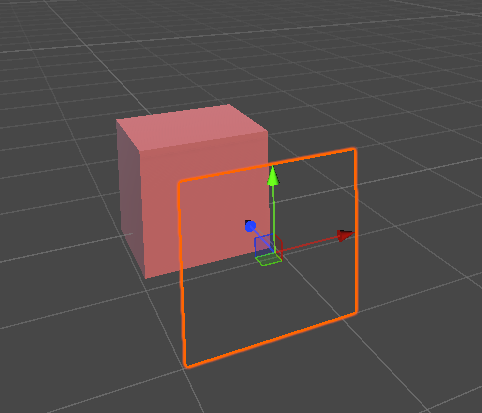
Set both the Quad and the Cube’s _StencilID to the same value, say 1.
Now when you move the Quad, you’ll see something interesting: only the regions occluded by the Quad will render the Cube.
If we have two Cubes with different _StencilID values and two Quads with matching _StencilID values, each Quad will only reveal the Cube with its corresponding ID, ignoring the other.
Here’s what’s happening:
- By default, the entire screen’s
Stencil Buffervalue is0, so bothCubeswon’t render outside of theQuad’s coverage. - Once a
Quadis rendered, it changes theStencil Buffervalues of its pixels. Because theCube’s shader usesComp Equal, it only renders in areas where the stencil values match.
Render Order
From the above, we can see a potential issue: the Quad must render before the Cube so that it updates the Stencil Buffer first.
If their render queues are the same, flickering may occur.
We can fix this by setting the Quad’s Queue to a smaller value than the Cube’s, ensuring it renders first.
Now the Cube renders stably without flicker:
Stencil Test Syntax
You can check the official docs2 or this Chinese article3 for more details.
The core syntax looks like this:
Stencil
{
    Ref <ref>
    ReadMask <readMask>
    WriteMask <writeMask>
    Comp <comparisonOperation>
    Pass <passOperation>
    Fail <failOperation>
    ZFail <zFailOperation>
}
<ref>is the reference value, and how it’s compared with theStencil Bufferdepends onComp.ReadMaskapplies a bitmask when comparing, andWriteMaskapplies a mask when writing.Compdefines howRefcompares to theStencil Buffer Value. The default isAlways(always passes).Equalpasses when equal, and there are also options likeLess,LEqual,Greater,NotEqual,GEqual, etc.Passdefines the operation performed on theStencil BufferwhenComppasses, such asKeep(leave as is),Replace(replace withRef),Zero,IncrSat,DecrSat,Invert,IncrWrap,DecrWrap.Faildefines the operation ifCompfails.ZFaildefines the operation whenComppasses but the depth test fails.
You can also specify front and back face operations separately (see the official docs).
A minimal example to modify the stencil buffer:
Stencil
{
     Ref 1
     Comp Always
     Pass Replace
}
A minimal example to test the stencil buffer:
Stencil
{
    Ref 1
    Comp Equal
}
Renderer Objects Feature
If every time we add a new Shader we also need to add Stencil Buffer logic and set _StencilID, that quickly becomes tedious—it means modifying a lot of materials.
Instead, you can use the Renderer Objects feature, as explained in impossible-geom-stencils4, to set Stencil without editing every shader.
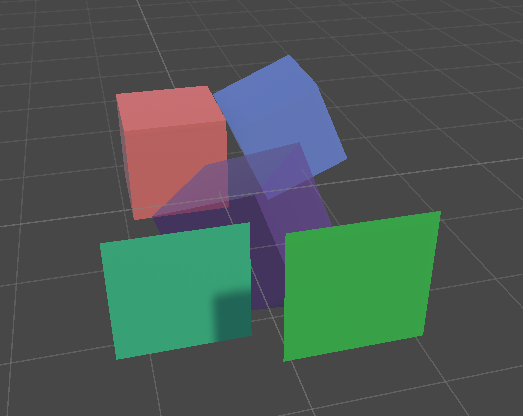
For example, imagine a scene with three Cubes and two Quads, where one purple Cube uses a transparent material:
First, replace the two Quads with the StencilFilter shader from earlier.
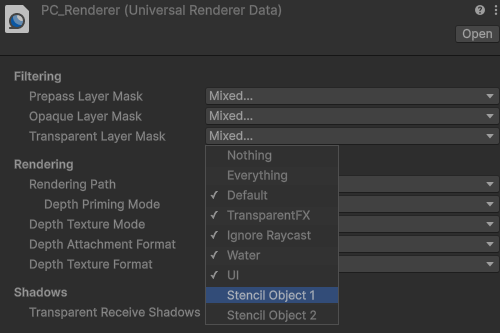
Then create two new Layers: Stencil Object 1 and Stencil Object 2, and assign the three Cubes to either of them.
Next, open the Universal Renderer Data settings and disable rendering for those two layers:
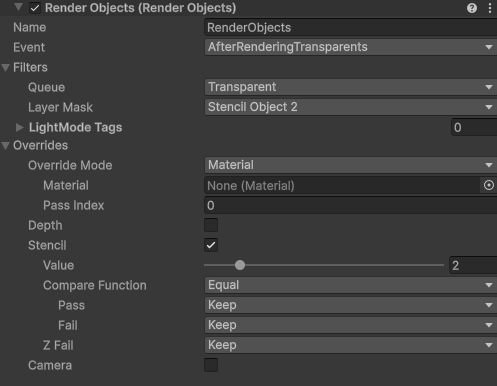
Now add a Render Objects Feature. In Filters, set the Layer Mask to Stencil Object 1/2. You’ll need four such features in total (2 queues × 2 layer masks).
In the Override section, enable Stencil, so you can override existing stencil settings. For example, set Comp to Equal and Value to match the intended ID.
Also pay attention to the Event timing:
- For
Opaque, useAfter Rendering Opaques. - For
Transparent, useAfter Rendering Transparents.
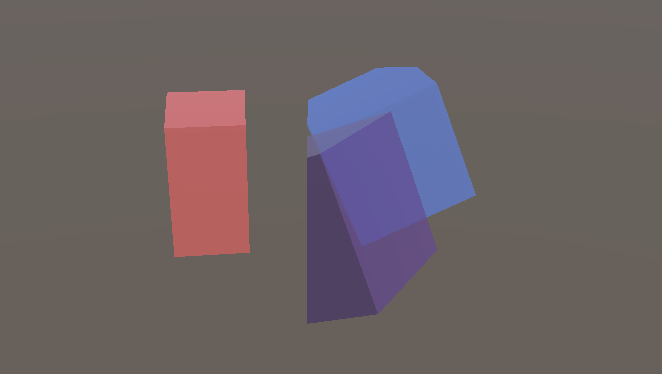
Here’s the result:
If we tweak the scene a bit, disable the skybox, and add color to the StencilFilter, we can create a Magic Cube:

Unity, 2025, writing-shader-set-stencil, https://docs.unity3d.com/6000.2/Documentation/Manual/writing-shader-set-stencil.html ↩︎
Unity, 2025, SL-Stencil, https://docs.unity3d.com/6000.2/Documentation/Manual/SL-Stencil.html ↩︎ ↩︎
lupeng0330, 2015, UnityShader实例09:Stencil Buffer&Stencil Test , https://blog.csdn.net/u011047171/article/details/46928463 ↩︎
Daniel Ilett, 2022, impossible geom stencils, https://danielilett.com/2022-01-05-tut5-22-impossible-geom-stencils/ ↩︎